Begin improving your photography skills today with these 20 Photography Tips for Beginners!
So, are you looking to upgrade your photography skills, or are you getting started on your photography journey? These 20 Photography Tips for Beginners are such simple and useful ways you can get started taking AMAZING photos… today!
In a nutshell, photography is all about learning exposure and composition. Once you have the basics of those two down, you can really start having fun experimenting more!
So what are you waiting for? Keep reading to learn more…
Photography Tips for Beginners:
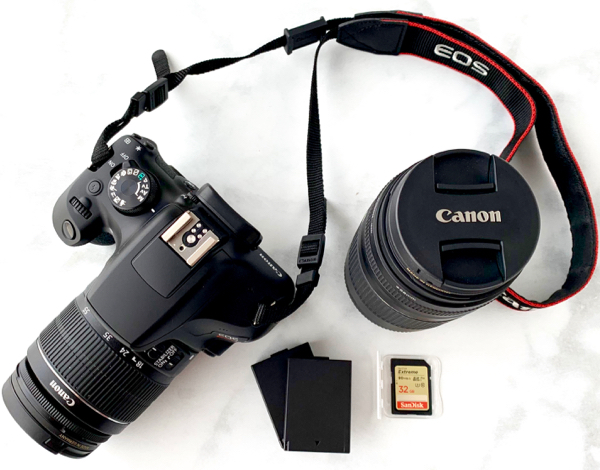
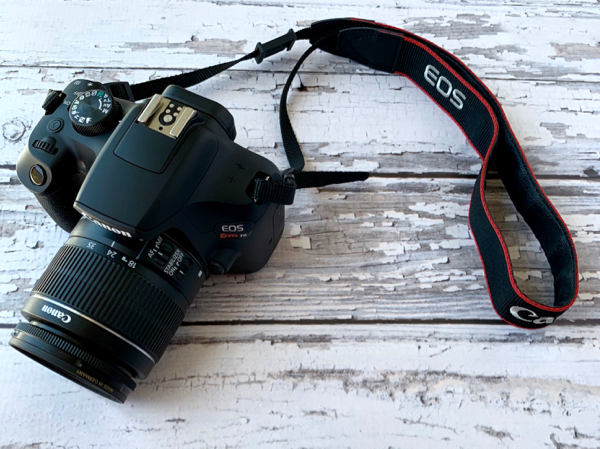
#1: Determine What Camera and Gear You’ll Use
The first step to getting started on your photography journey is to determine which camera you’ll use.
When you’re starting out, it’s okay to use any camera you have, even if it’s your phone. Ultimately, you can learn composition rules and photo editing. If photography is something you become serious about, you can always upgrade to a DSLR down the road.
It’s best to dip your toes in the water before throwing a lot of money towards a hobby!
#2: Narrow Down Which Types of Photography You’ll Focus on
You’ll want to really focus down on one, or maybe two types of photography in the beginning.
So what are the benefits of only doing one type of photography? By starting off more specialized, you can progress faster in your chosen niche. The faster you develop your skillset, the sooner you could use it towards a photography side hustle or hobby.
That’s not to say you need to lock yourself in niche forever – you just want to build a strong skillset before branching out. Now, what are some popular genres of photography?
- Landscape. This could be mountains, forests, deserts, lakes, oceans, jungles, or even cityscapes. Think almost anything outside.
- Portrait. Taking photos of people. Think weddings, business/professional, yearly family photos, etc.
- Pets and animals. This is less common genre of photography, but believe it or not, pet portraits are a real thing!
- Food. Food photography is very commonly used in marketing, especially for food corporations and restaurants. Also, it’s a useful skill to have if you run a food blog or have a food truck.
- Real Estate and architecture. Real estate listings need professional photos to appeal to potential clients, and that professional photographer could be you.
- Street photography. Street photography is very much an in-the-moment, sporadic type of photography. Think walking around a bustling city, and capturing everything you see along the way. If you want to take photos of people, just remember to ask permission first!
#3: Learn to Hold the Camera Properly
As simple as it may seem, learning to hold your camera steadily will tremendously help improve the quality of your photos. The more still you stand, the better.
What are some techniques to improve this?
- Hold the camera firmly with two hands.
- Use something for support – maybe try standing with your back to a wall, or use a wall to lean against. Less body shaking equals less camera shaking.
- Another helpful technique I use is to inhale, exhale halfway, take a few photos, then finish exhaling. All in the timeframe of 5 seconds, give or take.
These are some techniques that have helped me improve my photography skills, so I know from firsthand experience they’re effective. If you have any other tricks for reducing shakiness, please say so in the comments – I’d appreciate it!
#4: Learn to Take Photos in Manual Mode
If you have a DSLR camera, shooting in manual mode is going to have a steeper learning curve when compared to ?. However, by starting out only shooting in manual mode and becoming proficient, you’ll actually have an easier time switching over to the various modes on your camera later on.
As the humorous photography saying goes, “Everyone’s a photographer until… manual mode.” So, do yourself a favor and be a real photographer from the beginning. 😉
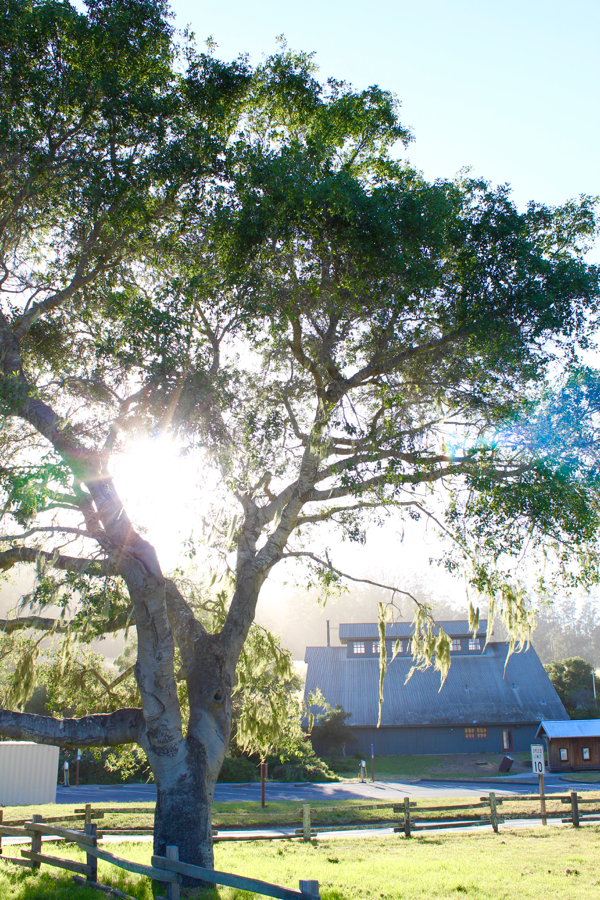
#5: Master Your Photography With the Exposure Triangle
In photography, the “exposure triangle” consists of aperture, shutter speed, and ISO. Learning these 3 functions and their relation to one another is a critical and fundamental step to advancing beyond being an amateur level photography.
- Aperture controls how much light is let into your camera frame. The aperture is measured by the “f-stop” on your camera. The smaller the number, the more light will be let in, and the higher the number, the lesser amount of light will be let in. For instance, a photo taken at F/3.5 will be drastically brighter than the photo taken at F/11.
- Shutter Speed is mainly used for controlling the blur in your photos, as well as controlling some light. Basically, it’s the small flap that covers your camera sensor every time you take a picture. Faster shutter speed means less blur and more darkness. Slower shutter speed, means more blur and less darkness. Shooting at 1/8 will be drastically brighter than 1/500, for example.
- ISO. By using software within your camera, ISO controls the exposure by going darker or brighter. For example, my Canon T6i ranges from ISO 100 to ISO 6,400. The bigger the number, the brighter (and grainier) the photo will be. Shooting on ISO 100 will get you a darker but clearer photo, whereas ISO 1,600 will be fairly bright and grainy. You might use ISO 100 outside on a bright sunny day, and you might use ISO 800 {or higher} inside in the evening.
#6: Research Interesting Places to Practice Your Photography
Researching interesting locations before photographing them is an excellent way to plan ahead, and save time in the long run. You can do this by talking to other photographers, or researching online.
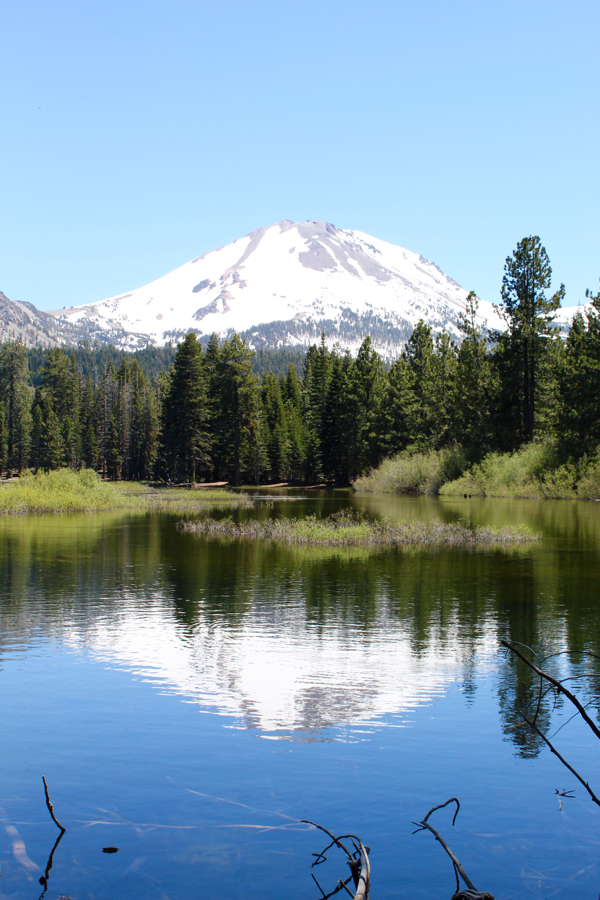
For example, I went online to find the best viewpoints of Mount Lassen in Northern California, and the view from Manzanita Lake (northwest of the peak) had excellent views with the peak reflected in the water. So when I visited Lassen Volcanic National Park, I made sure to hike the Manzanita Lake trail and photograph the peak from there!
#7: Practice Your Photography at Different Times of Day
Taking photos at sunrise, late morning, the afternoon, sunset, and at night can help you learn to use whatever lighting you have to your advantage. Plus, shooting at different times of day will make you more flexible with your options when you’re out and about!
Again, this is an easy way to improve your photography skillset.
#8: Look for Fresh and Interesting Photo Ideas
The trouble with 90%+ of photos I see around the web or on Instagram is that so many of them look exactly the same. Food is presented the same way, major sites are photographed the same way, etc. To combat this, start photographing things with a new perspective.
Don’t take all of your photos at eye level! Are all the photographers flocking to the same spot? Go somewhere different. Do all photographers head to a particular landmark on sunny days? Wait for more dramatic weather.
Now, doing this can become seriously addictive once you start! By approaching your photos with, “How can I capture this with a unique perspective?”, you’ll take your photography game up a few notches.
#9: Bring Depth to Your Photo
Another issue with so many photos – landscape photos, in particular – is that there is no depth. There may be a nice background, but no clear mid or foreground.
Imagine you’re in the middle of a spectacular Redwood forest, or looking out at a majestic snowy mountain range. You snap some photos, come home and show your friends – except the photos don’t truly do the place justice. I had this issue for so many years, and know the struggle all too well.
There are a few of things you can do here.
- Having a distinct foreground, middle ground, and background
- Use the Rule of Thirds
- Use leading lines
- Place people or objects in landscape photos to give perspective.
Read tips #10, #11, and #12 to learn the Rule of Thirds, leading lines, and having a distinct foreground, middle ground, and background.
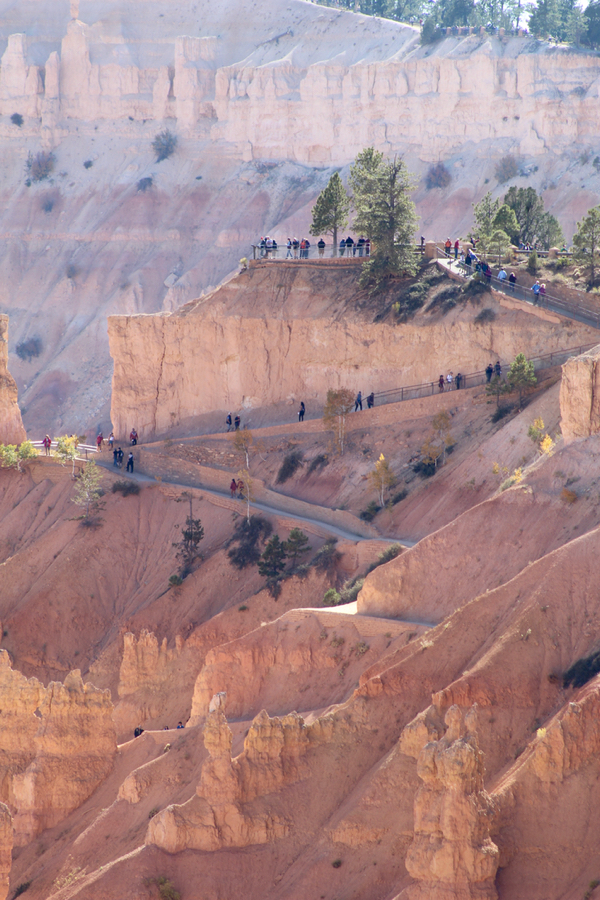
#10: Learn the Rule of Thirds
Learning the rule of thirds is one of the most simple, yet important things you could possibly do in your photography journey.
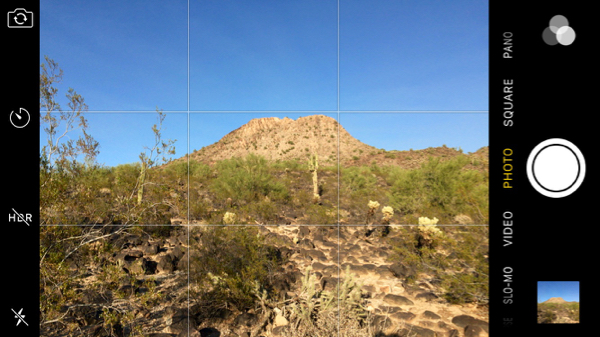
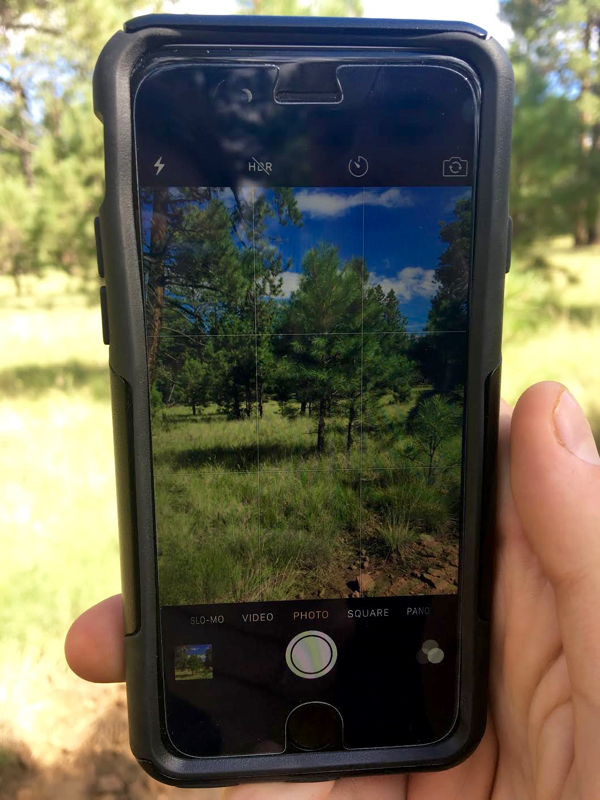
What is the rule of thirds? In a nutshell, it’s drawing four lines – two vertical, two horizontal – dividing your viewer into 9 quadrants. Most cameras actually have a function where you can turn this on.
Here’s what it looks like on an iPhone 6:
Now, you’ll notice there are 4 points created from the intersecting lines. When you place the subject of your photo on one of those four points, as well as use the layers to create a foreground, mid-ground, and background, you’re well on your way to improving your photography skill set.
#11: Use Leading Lines
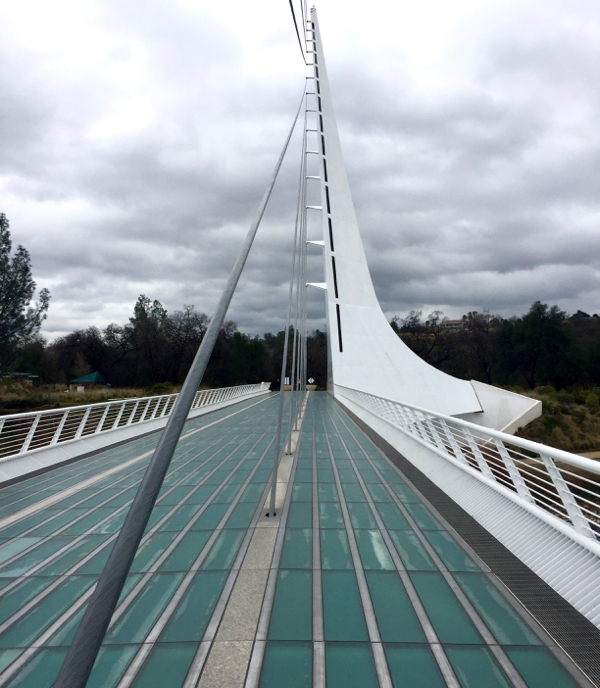
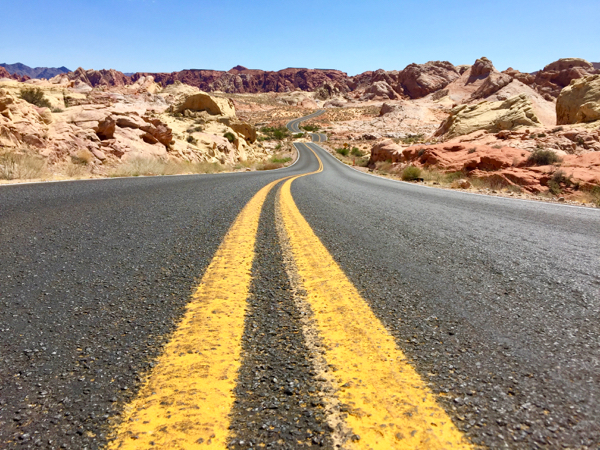
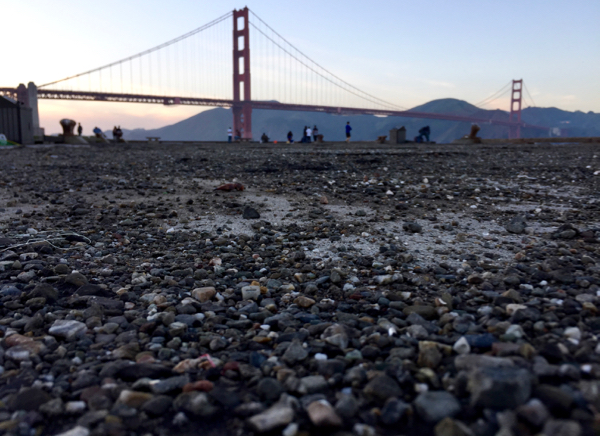
Leading lines are all about drawing the viewer’s eyes to the subject, and one of the most important photography tips for beginners. Below, I have two photos for reference.
In this photo, the subject is the white bridge tower. Notice how the cables and the railing to the right draw the the eyes up to the subject.
Now, here’s a less gloomy photo – that’s the difference between Northern California and Southern Nevada. In this case, the yellow median lines and the road wind through the rugged desert terrain, ultimately to the red sandstone rock formations in the background.
#12: Have a Distinct Front, Middle, and Background
Clearly defining what is in the front, middle, and background becomes especially easy when you use the rule of thirds. Then, use leading lines to connect the object, and you’re set to go!
#13: Seek Out Dramatic Weather
Here’s a stereotypical foggy San Francisco morning with a seagull and the infamous Alcatraz Island in the background. The intensity of the seagull’s eyes and drab Alcatraz are readily met with gloomy weather, creating a mood that would not have been possible on a sunny day.

#14: Focus on Elimination.
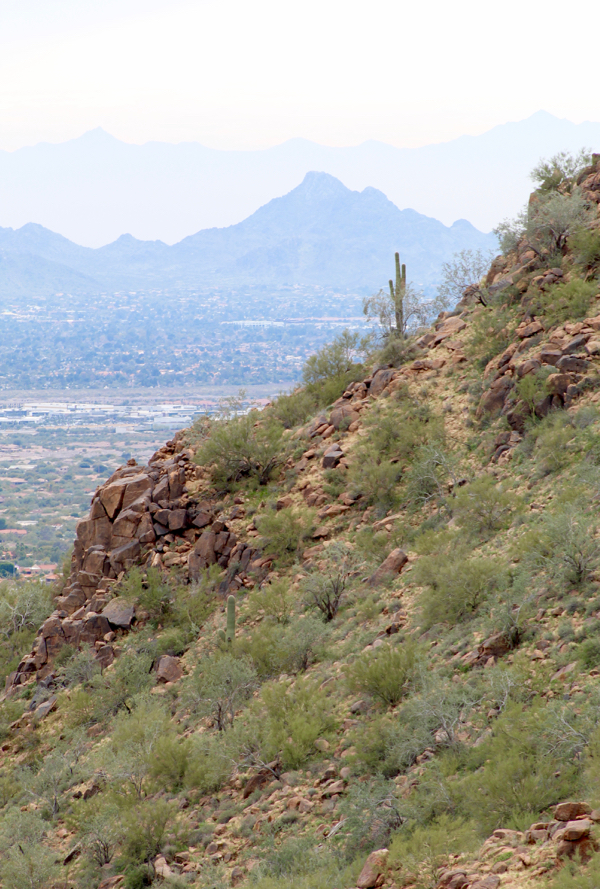
What is your subject? Be careful not to clutter up the frame with too many unnecessary objects. Here is a prime example of what not to do.
My intention was for the subject to be the rugged mountain in the background. However, the mistake I made was having to many cacti in the foreground and mid-ground cluttering of the frame. Because of this, the viewer of the photo doesn’t know what to focus on.
Now, here’s an example of what to do. This photo is broken up into three frames, with the top being sky, the middle being hot air balloons, and the bottom consisting of dirt, trucks, and people. By not cluttering up the photo and preserving a good amount of “negative space”, it’s easier to focus on the subject: the hot air balloons.
The frame is mainly filled with “negative space” (emptiness), which makes it easier to focus on the hot air balloons.
#15: Be Patient
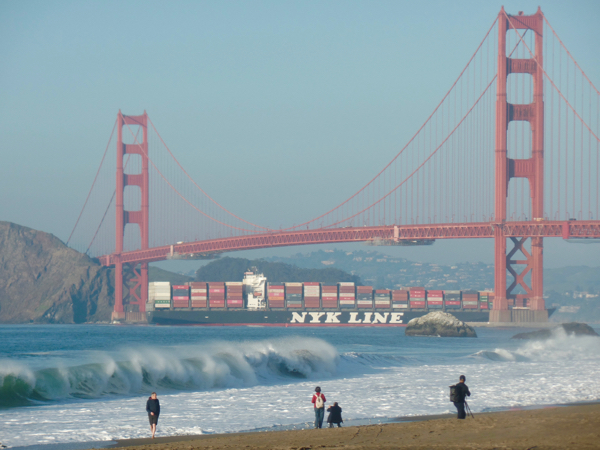
Sometimes, you simply have to wait to get the best shots. Maybe you need the lighting to improve, some clouds to pass, or, in this case, a gigantic ship and the perfect wave to come. Patience will get you a long ways in taking good photos!
Here, I waited an hour before capturing this photo.
#16: Break the Rules and Experiment
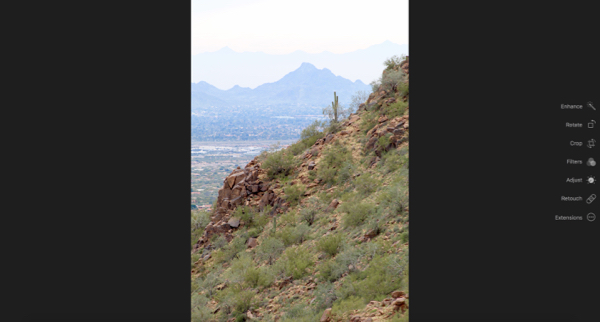
Understandably, there’s a few spoken and unspoken rules in photography. Most landscape photos ‘should’ shot horizontally, and most portraits vertically. Sometimes, however, it can be fun to change your lens and try something new for once.
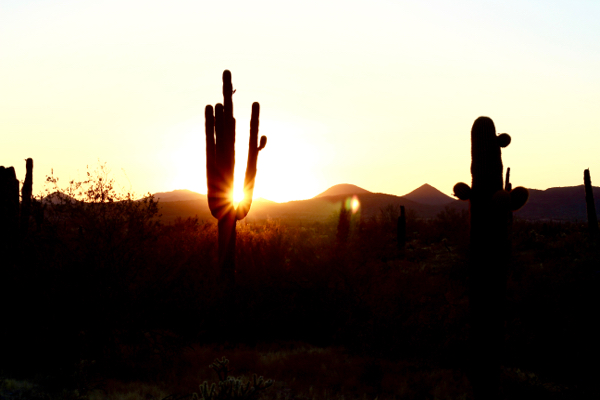
Try vertical shots of landscapes. Try horizontal portraits. Or go crazy and shoot towards the sun at sunset, instead of having the sun to your back. You can start coming up with some very interesting scenes. Have fun with it and experiment!
#17: Learn Basic Photo Editing
Most of the time, photos need a little post-process editing to look their best. Learning the basics of photo editing, whether it’s the built in function on your computer or Lightroom, is a must.
#18: Store Photos on Multiple Devices and Hard Drives
This is so incredibly important. Make sure to have your photos at least 2-3 different places – such as, on your computer and two hard drives. By doing this, you’ll reduce the risk of ever losing your photos for good.
#19: Study Your Photos – And Improve
Reviewing old photos you’ve taken is an excellent way to improve going forward. Look at what you like and don’t like in your photos, see how you can improve, and take it from there.
#20: Spend a Little Time Every Day Improving Your Skill Set
You just can’t beat actual daily practice when it comes to photography, even if it’s only for 15 or 20 minutes. Stay consistent, and you’ll be pleasantly surprised how far you’ve come after a year. Make it a goal to at least take a few pictures every day this year. 🙂
So, now that you know these photography tips for beginners, go check out even more tips to improve your photos below…
Phone Camera Photography Tips
There are so many easy ways to take awesome pictures with your phone! Whether you’re traveling or capturing some fun moments at home during the holidays… you’llbe amazed at how these tricks will totally transform your photos!
Travel Photography Tips
So, are you ready to take your travel photos to the next level? You’ve just hit the jackpot of Travel Photography Tips and tricks! Traveling is the perfect time to put these skills to use! When in a new destination, your senses are heightened, everything around feels so exotic, and there is no better time to put your camera skills to use! These Travel Photography Tips will give you a base off of which you can begin advancing your skill level.
Blog Photography Tips
While every skill used in blogging is worth investing some time into, there is one skill in particular that stands out from the rest: Photography. Good photography is what takes an average or so-so blog, and makes it great!
So, now that you’ve seen all of these Photography Tips for Beginners, don’t miss out on anything else! Follow along with Never Ending Journeys for more fun photography inspiration and ideas!
So, what are YOUR Favorite Photography Tips for Beginners?
Leave a Comment and Share!









MSDT says
Amazing!!!
Rebecca Gardner says
Thanks for explaining why it’s important to be patient when trying to take a good-looking photo. My sister is interested in having a custom-designed background created that she can use to take high-quality pictures of her kids at home. I’ll share this advice to help her end up with portraits that look great!
Christie says
You’ve shared so many amazing tips that I’ve never thought of! Thanks for sharing!
Never Ending Journeys says
Thank you so much, Christie!
Michelle | Sift & Simmer says
Love all those tips! But practice does make perfect! 🙂
Never Ending Journeys says
I absolutely agree, Michelle. Thank you so much!
CoCo says
This is such a helpful post, Caleb, thank you for sharing it! I’ll definitely be putting these tips and tricks into practice. Especially, the one about practicing every day. Photography really is an art form.
Never Ending Journeys says
Thank you so much, CoCo. I agree!
delphine says
merci pour tes conseils, j’ai envie de m’acheter un bel appareil photos pour améliorer mes photographies culinaires
Belle journée
Never Ending Journeys says
Di rien, delphine! J’espère que vous apprécierez les conseils. 🙂
Heidi | The Frugal Girls says
I love using Lightroom, it really is such a fabulous tool. That was also a smart tip you shared about working on our photography skills everyday. Consistent practice really has helped me.
Never Ending Journeys says
Thank you, Heidi.
Aarthi | Prepbowls says
These are so helpful tips , all the point are equally important I think , and your picture description is lot easier to understand , thanks for sharing this information with us!
Never Ending Journeys says
Thank you so much, Aarthi!